This post shows you easy Reindeer Nail Designs
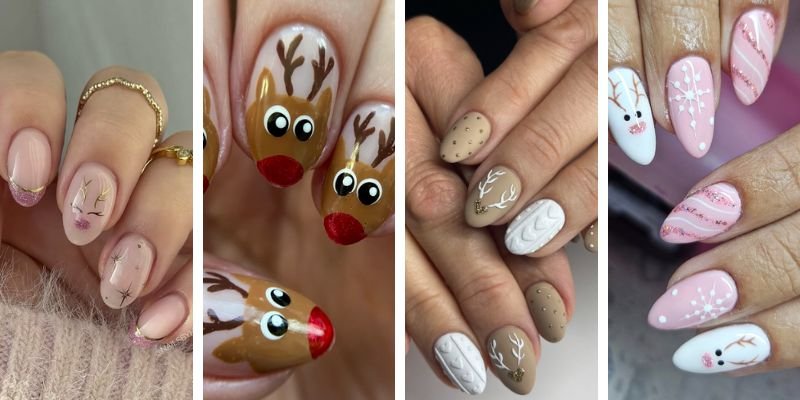
The holidays are crazy enough without spending three hours on your nails. But you still want to look festive, right? That’s where these simple reindeer nails come in clutch. They look way more complicated than they actually are, and honestly, that’s the best kind of nail art.
Why Reindeer Nails Are Perfect for Busy Holiday Schedules
Christmas reindeer nails hit that sweet spot between festive and wearable. Unlike some of those over-the-top holiday designs that scream “I can’t hold a coffee cup properly,” reindeer nail designs actually work for everyday life. You can rock them to work, holiday parties, or just grocery shopping without looking like you’re trying too hard.
Some time ago at a holiday party, three different people asked where I got my nails done. When I told them I did them myself in about 15 minutes, they didn’t believe me. That’s the magic of these designs – they look professional but don’t require a professional nail artist.
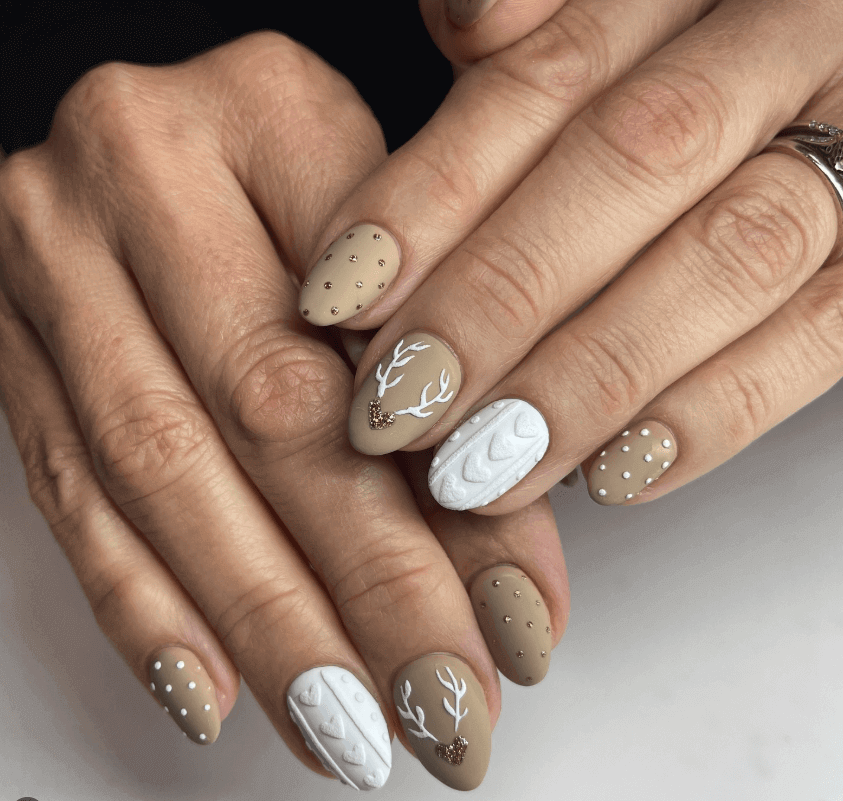
Simple Reindeer Nails
Here’s the thing about Rudolf nails – you don’t need to be Michelangelo with a nail brush. The trick is starting with a solid base and keeping the design elements simple. Most cute Christmas nails fail because people try to cram too much detail into a tiny space.
Start with a neutral base color. Nude, soft pink, or even a light brown works perfectly. This gives you that subtle Christmas nails vibe without being too in-your-face. Let that dry completely – and I mean completely. Nothing ruins a design faster than smudging your base coat because you got impatient.
For the antlers, use a thin brush or even a toothpick dipped in brown polish. The key is making them slightly imperfect. Real antlers aren’t symmetrical, so don’t stress about making them match exactly. Draw two curved lines from the base of your nail, branching out like tiny tree branches. If you mess up, just wipe it off and try again. The beauty of these winter nails ideas is their forgiving nature.
Festive Christmas Nails
Once your antlers are dry, it’s time for the fun part. A tiny red dot for Rudolph’s nose transforms the whole design. Use a dotting tool, or honestly, just the tip of a bobby pin works great. Place it right where you’d expect a reindeer’s nose to be – slightly below and between the antlers.
For the eyes, two small black dots do the trick. Don’t overthink this part. Simple is better than trying to create elaborate eyelashes or expressions. These easy Xmas nails should look charming, not like you’re entering a nail art competition.
Some people like adding tiny white dots for highlights in the eyes, but honestly? Skip it unless you’re feeling really ambitious. The design looks complete without them, and you’re more likely to mess up trying to add unnecessary details.
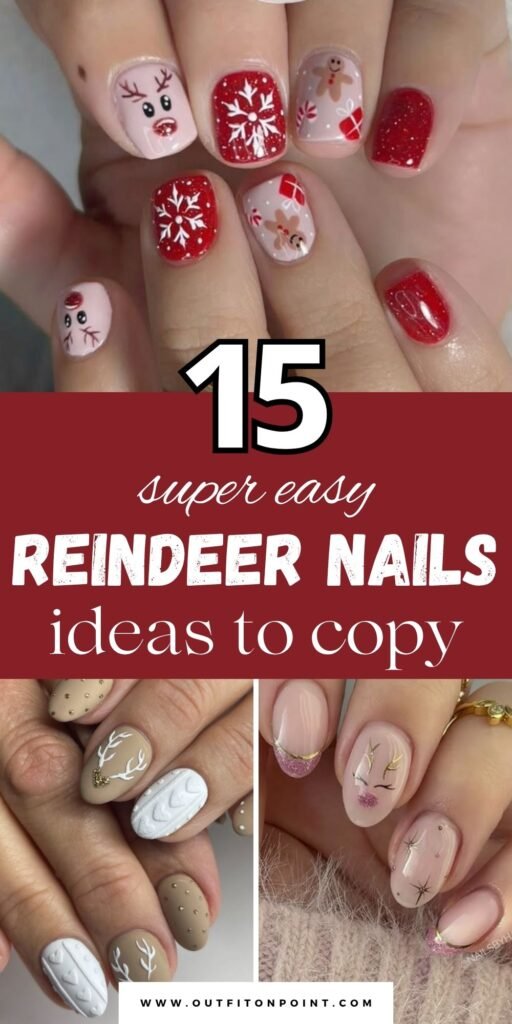
Holiday Nails Winter Christmas Variations
The beauty of this design is how adaptable it is. Want pink reindeer nails? Use a soft pink base instead of nude. Feeling more winter-themed? Try a pale blue or silvery base color. The antlers and facial features work with pretty much any background color.
For those who want slightly more elaborate Christmas nail inspo, try adding tiny snowflakes around the reindeer. A white nail art pen makes this super easy – just draw simple asterisk shapes in random spots. Don’t go overboard though. Three or four snowflakes per nail is plenty.
Another variation that works well is doing the reindeer design on just your ring fingers, with the other nails in coordinating solid colors. This gives you that trendy accent nail look while keeping the overall design wearable for everyday activities.
Christmas Gel Nails: Making Your Design Last
If you’re using gel polish, these designs are even easier to perfect. The longer working time means you can take your time with the details without worrying about the polish drying too fast. Plus, gel Christmas nails trendy designs last way longer than regular polish – important when you’re planning to wear them through multiple holiday events.
When working with gel, remember to cure each layer completely. Do your base color and cure it. Add your antlers and cure again. Then add the nose and eyes, and give it one final cure. This layered approach prevents smudging and gives you crisp, clean lines.
The downside of gel is that mistakes are harder to fix once cured, so practice the design with regular polish first if you’re nervous about messing up.
Simple Christmas Nail Art for Beginners
Let’s talk about what makes these nails for winter actually doable for beginners. First, you’re not trying to paint detailed pictures. The reindeer face is basically geometric shapes – lines for antlers, dots for features. Even if your hand shakes a bit, it’ll still look intentional and charming.
Second, the design works on short nails just as well as long ones. You don’t need perfect nail length or shape to pull this off. Actually, shorter nails might be easier to work with since there’s less surface area to mess up.
The color palette is also beginner-friendly. Browns, reds, and blacks are forgiving colors that don’t show brush strokes as much as lighter shades. If you accidentally make one antler thicker than the other, just thicken the other one to match. Problem solved.
Christmas Nail Ideas Beyond the Basic Reindeer
Once you’ve mastered the basic reindeer design, there are tons of ways to mix things up. Try creating a whole Christmas scene with reindeer on some nails and Christmas trees on others. Or do different reindeer expressions – some with regular black noses, others with Rudolph’s red nose.
For those wanting more elaborate Christmas nail designs, try adding small rhinestones as ornaments hanging from the antlers. This takes the design from cute to elegant while still being relatively simple to execute.
Another fun variation is doing silhouette reindeer instead of faces. Use black polish to create the outline of a reindeer head with antlers against a sunset-colored background. This gives you a more sophisticated look while still being recognizably festive.
Tips for Easy Reindeer Nail Art:
For easy reindeer nail art, consider simple designs like drawing a reindeer face on one or two nails, using dotting tools for antlers and a red dot for the nose. You can also create a reindeer pattern using a stamping plate or nail stickers for a more uniform look.
Base Coat: Always start with a base coat to protect your nails and help the polish adhere better.
Top Coat: Finish with a top coat to seal in your design and add shine.
Practice: If you’re freehanding, practice on paper or a nail wheel before applying it to your nails.
Clean Up: Use a small brush dipped in nail polish remover to clean up any mistakes.
Simplify: If you’re struggling with intricate designs, simplify them. A simple brown oval with dots for eyes and antlers can be just as cute.
Making Your Simple Christmas Nails Last
The key to long-lasting holiday nail art is proper prep and sealing. Make sure your nails are completely clean and dry before starting. Use a base coat – always. This protects your natural nails and helps the color adhere better.
After your design is complete and dry, seal everything with a good top coat. This prevents chipping and adds shine that makes even simple designs look professional. Reapply top coat every few days to maintain that glossy finish.
For extra durability, avoid using your nails as tools (easier said than done during gift-wrapping season), and wear gloves when cleaning or doing dishes. These small steps can double the life of your manicure.
These reindeer nail designs prove that holiday nail art doesn’t have to be complicated or time-consuming. With just a few simple techniques and some patience, you can create festive nails that look like you spent way more time and money than you actually did. And honestly, isn’t that the best kind of beauty hack?

Hi, I’m Maleesha, a fashion writer who focuses on practical outfit ideas for everyday wear. I share styling tips based on real-life scenarios, budgets, and comfort — not just trends.
Leave a Reply