This site contains affiliate links, view the disclaimer for more information.
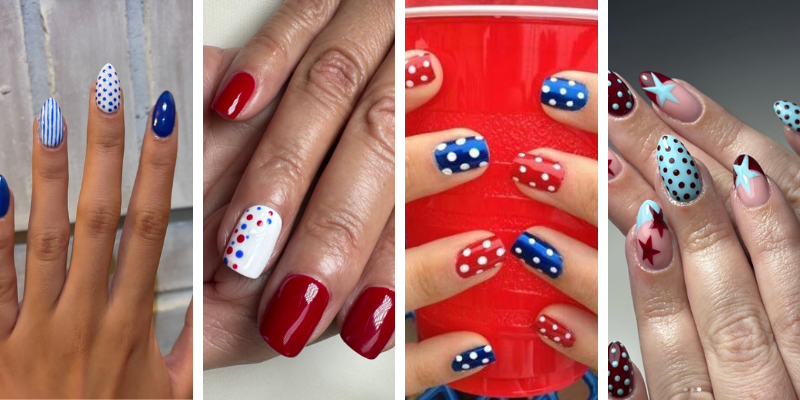
Polka dot nails are genuinely the most forgiving nail art design out there. They’re imperfect by nature, which means even when your dots aren’t perfectly round (and trust me, mine never are), they still look intentional and cute. If you’ve been searching for 4th of July nails polka dots ideas that actually work for real people with real, non-steady hands — you’re in the right place.
Why Polka Dot Nails Are Perfect for the Fourth of July
Here’s the thing nobody really talks about. The 4th of July is one of those holidays where your nails are constantly on display. You’re waving sparklers, passing potato salad, holding up a red solo cup — your hands are literally part of the party. So you want something that looks festive without feeling like a chore to pull off.
Polka dots check every single box. They’re fun nail designs that photograph beautifully, they work on short nails and long nails, and they’re honestly one of the most simple patriotic nails you can do at home. I’ve done these on almond-shaped nails, square nails, and even my weird slightly-crooked pinky nail, and they always turn out adorable.
The best part? You don’t need any fancy nail art tools. A bobby pin, a toothpick, or even the back end of an earring will get you perfect dots every time. More on that in a sec.
What You’ll Need Before You Start
Being prepared is like half the battle here. I used to just wing it and then be annoyed when my polish was too thick or too dry to make clean dots. So let’s set you up for success before we even open a bottle.
Here’s what I’d grab:
- A white nail polish base (this is your best friend for red white and blue nails)

- A super-rich, long lasting and chip resistant nail polish with up to 7 days of wear when using 3-step system
- Pro-wide nail polish brush hugs nails for smooth, even coverage sans streaking or bubbling
- Salon-quality formula that delivers high-shine and fast-drying results
- A true red polish — I love OPI’s “Cajun Shrimp” or Essie’s “Really Red” for this

- A super-rich, long lasting and chip resistant nail polish with up to 7 days of wear when using 3-step system
- Pro-wide nail polish brush hugs nails for smooth, even coverage sans streaking or bubbling
- Salon-quality formula that delivers high-shine and fast-drying results
- A bright or navy blue — Sally Hansen’s “Commander in Chic” is so good
- A clear top coat (Seche Vite dries in like 5 minutes and it’s a game changer)
- A dotting tool, bobby pin, or toothpick
- A small piece of aluminum foil to use as a palette
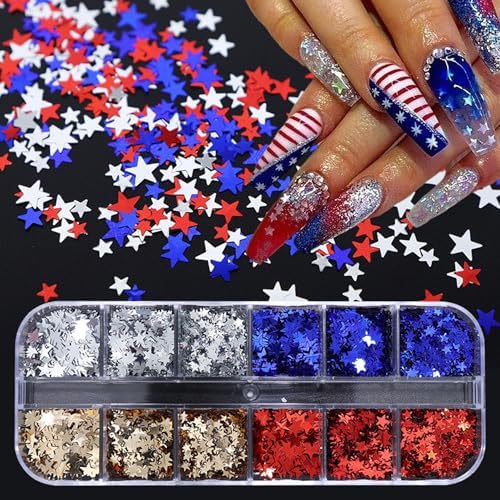
- 【Quantity】You will receive 12 girds independence day nail art sequins, gradient laser glitter nail art design, convenien…
- 【 Design 】Independence day star design nail glitters art set are safe, environmentally friendly, non-polluting and harml…
- 【Easy to Use】Suitable for professionals or beginners. Nails glitter sequins perfect for natural or artificial nails, and…
The foil palette trick is something I learned after ruining about three nail art sessions trying to dot directly from the bottle. You just drop a tiny bit of polish onto the foil, dip your tool in, and dot away. The polish stays wet longer and you get way more control. Honestly wish someone had told me that years ago.
The Classic Red, White, and Blue Polka Dot Design
This is the one that started it all for me, and it’s still my favorite 4th of July nail design. It’s simple, it’s classic, and it genuinely looks like you paid someone to do it.
Start with two coats of white polish on all your nails. Let that dry completely — and I mean completely. Rushing this step is what causes all those smudges and you’ll be so mad at yourself. Give it at least 10 minutes, or if you’re using gel, cure it fully under your lamp.
Once your white base is dry, use your dotting tool to add red dots randomly across two or three nails. Then switch to blue and dot a different set of nails. On your remaining nails, you can mix both colors or go with just one. There’s no strict rule here — that’s the beauty of polka dots. They’re supposed to look a little scattered and playful.
Finish with a glossy top coat and you’ve got yourself some seriously cute 4th of July nails in under 30 minutes. I’ve timed it. It really doesn’t take long once you get the hang of it.
The Glitter Dot Upgrade
Some years I just want my nails to really pop, you know? Like, fireworks are going off and I want my hands to compete. That’s when I do the glitter dot version, and oh my gosh it’s so fun.
The process is basically the same as above, but instead of using regular polish for your dots, you use a chunky glitter polish or even loose glitter mixed with a clear base. The dots end up looking almost 3D and they catch the light in the best way. This is one of those trendy summer nails 2026 looks that’s been all over Pinterest lately, and for good reason.
One tip — let your base color dry a little longer before adding glitter dots. Glitter polish tends to be thicker and it can drag your base color if it’s still tacky. I learned that the hard way on a set of nails that ended up looking like a red, white, and blue abstract painting. Not cute.
Simple 4th of July Nails for Beginners
If you’re totally new to nail art, please don’t stress. I want to walk you through the absolute easiest version of this look because easy 4th of July nails should actually be easy, not just labeled easy by someone with 10 years of nail art experience.
Here’s the simplest version: paint all your nails with a navy blue base. Then take a bobby pin and dip the rounded end into white polish on your foil palette. Press it gently onto your nail and lift straight up. That’s a dot. Do that across all your nails in a random pattern and then add a few red dots in between for a festive pop of color.
That’s literally it. No special skills required. This version of simple 4th of July nails honestly looks so good and it takes about 20 minutes including dry time if you’re using a quick-dry top coat. I’ve shown this method to people who swore they “couldn’t do nail art” and every single one of them pulled it off on the first try.
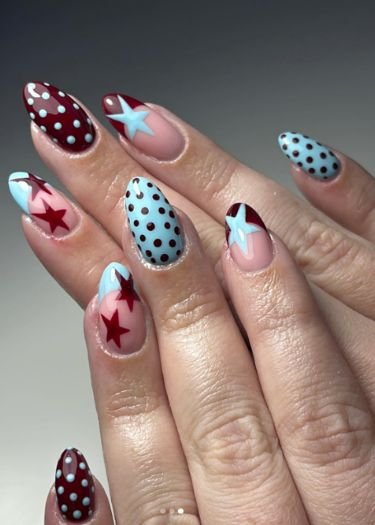
Almond Nail Polka Dot Ideas for the Fourth
Okay, for my almond nail girls — this shape is so good for polka dot designs. The elongated shape gives you more surface area to play with and the dots look more elegant somehow. Like, the same design that looks playful on a square nail looks almost classy on an almond.
My favorite 4th of July nails almond look is a nude or soft pink base with red, white, and blue dots clustered near the cuticle area. It gives this really pretty gradient effect without actually doing a gradient, if that makes sense. You’re basically concentrating your dots at the base of the nail and letting them thin out toward the tip.
This is one of those classy 4th of July nails looks that works if you’re going somewhere a little more upscale for the holiday — like a rooftop party or a dinner — but still want to be festive. It’s subtle enough to be sophisticated but still clearly patriotic when people look closely.
Gel Polish Polka Dot Nails for Longer Wear
If you’re doing a gel manicure at home, good news — polka dots work amazingly with gel and they last so much longer. We’re talking 2 to 3 weeks of chip-free wear, which means your 4th of July gel nail designs will still look good well into mid-July.
The process is a little different though. With gel, you’ll cure your base color under the lamp, then apply your dots using a thin gel polish or even nail art gel, and cure again before adding your top coat. The key thing is to cure each layer separately so nothing smears.
I’d also recommend using gel nail art pens for the dots if you have them. They give you way more precision than a dotting tool and the lines stay exactly where you put them. Modelones and Beetles both make affordable gel nail art pens that work really well and you can usually find them on Amazon for around $8 to $12.
Fourth of July French Tip with Polka Dots
This one’s for the people who want something a little more refined but still fun. Take a classic French tip manicure — white tips, natural base — and add tiny red and blue polka dots along the smile line or scattered across the nail bed. It’s such a pretty twist on a traditional look.
This combo gives you fourth of july nails easy vibes with a little extra polish (pun intended). The French tip does a lot of the heavy lifting aesthetically, so your dots just need to be there — they don’t have to be perfect. A few imperfect dots on a clean French tip still looks intentional and adorable.
I wore this version to a 4th of July barbecue a few years back and got genuinely more compliments on my nails than I ever had in my life. Someone asked if I’d gotten them done professionally. I had to try really hard not to laugh.
Tips I Wish Someone Had Told Me Earlier
Alright, let me just do a quick roundup of the things I’ve learned through a lot of trial and error, because I don’t want you making the same mistakes I did.
Wait longer than you think between coats. Seriously. Even if the surface feels dry, the polish underneath might still be soft and your dots will smudge right into it.
Less polish on your tool is better. Dip, then dab the excess off on the foil before touching your nail. A dot that’s too heavy will spread and lose its shape.
Embrace the imperfection. Polka dots are not supposed to be uniform. If they were, they’d look fake. A little variation in size and spacing actually makes the design look more organic and handmade in a good way.
Always seal with top coat. This protects your design and adds that salon-quality shine that makes the whole thing look finished. Don’t skip it.
4th of July Polka Dot Nails
Whether you’re going for bold America nails 4th of July vibes with chunky glitter dots, or a more subtle and classy 4th of July nails look with tiny dots on an almond shape — polka dots are genuinely the most versatile and forgiving nail art you can do for the holiday.
They work for every skill level, every nail shape, and every vibe. And once you do them once, you’ll wonder why you ever stressed about holiday nail art at all.

Hi, I’m Maleesha, a fashion writer who focuses on practical outfit ideas for everyday wear. I share styling tips based on real-life scenarios, budgets, and comfort — not just trends.
Leave a Reply